| Info |
|---|
Please refer to Digital Signage |
The process for creating a schedule follows these steps:

Steps for creating a new schedule
To create a schedule:
Select the "Signage" link in Vivi Central. A list of existing schedules be displayed.
Click "Create Signage Schedule".
Select the organisation that the schedule belongs to, and give the schedule a name.
Click "Next" to proceed to the "Destinations" step.
Choose whether to display to a "Signage Group" or an individual "Room. Depending on what you have selected, a list of signage groups or rooms are displayed. Select the required group or room.
You can also create a new signage group if required by clicking "New Signage Group". Refer to the "Creating a Signage Group" section if you need help with this. Once the signage group is created, it will appear in the list and can be selected.
Click "Next" to proceed to the "Playlists" step.
Choose whether to display a "Playlist" or some individual "Media". Depending on what you have selected, a list of playlists or media are displayed. Select the required playlist or media.
Media can be uploaded from within the schedule Wizard by clicking "Add Media". Refer to the "Uploading Media" section if you need help with this. Once the media is uploaded, it will appear in the list and can be selected.
You can also create a new playlist from within the schedule Wizard if required by clicking "New Playlist". Refer to the "Creating a Playlist" section if you need help with this. Once the playgroup is created, it will appear in the list and can be selected.
Click "Next" to proceed to the "Date and Time" step.
Select the data and time that the playlist or media should be displayed. This can be set up as a once off event, or on a regular schedule. A sample of setting a daily announcement at 9am on school days is shown below.
You can also set "Precedence" here, this will enable you to have the signage interupt people sharing. You three options are;
None: This means any user attempting to connect and share to the room with stop the schedule
Interrupt: This will automatically stop screen sharing and video playing when the schedule begins
Interrupt and Lock: This will prevent screen sharing and video playing while the schedule is in progress
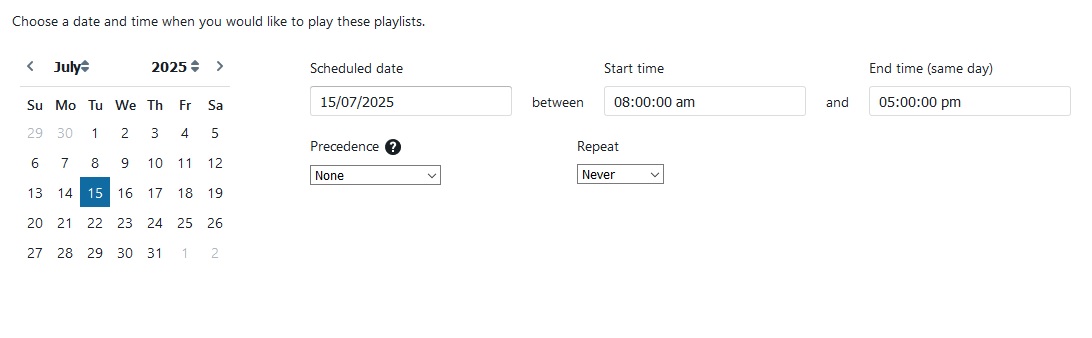
Setting the date and time for a schedule
Click "Next" to proceed to the "Overview" step.
An overview of the schedule will be displayed. Click "Submit" to save the schedule or "Previous" to go back and change the details.
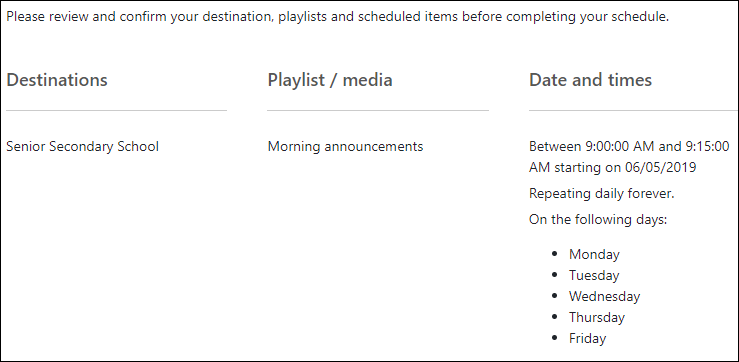
Schedule overview
Click "Submit" to create the schedule.
Please note: The priority of schedules is first-in, first-served.
...