Vivi-enabled Displays can be used to aid in the response to an emergency situation such as a lockdown or an evacuation.
Emergency management can be enabled for the organisation.
Triggering of emergencies can be made available to all presenters, or restricted to Vivi accounts with the "Emergency Authorised" role.
Once emergency management is enabled, a running man icon appears in the top right-hand corner of Vivi App for each user who is able to trigger an emergency. It is not displayed to regular users.
Vivi App icon for triggering an emergency
...
To enable emergency management:
- Select the "Organisation" link in Vivi Central.
- Select the "Emergencies" link.
- Click "Edit".
- Select "Enable" to enable emergency management.
- If the "All Presenters Can Trigger Emergencies" option is selected, then all users with the "Presenter" role will be able to trigger an emergency. If it is not selected, only users with the "Emergency Authorised" role will be able to trigger an emergency.
- If the "Ignore Locations" option is selected, emergency broadcasts will go to everyone, regardless of the location. If the option off, then emergency broadcasts will only be displayed within the location where it was triggered.
- Click "Save Changes".
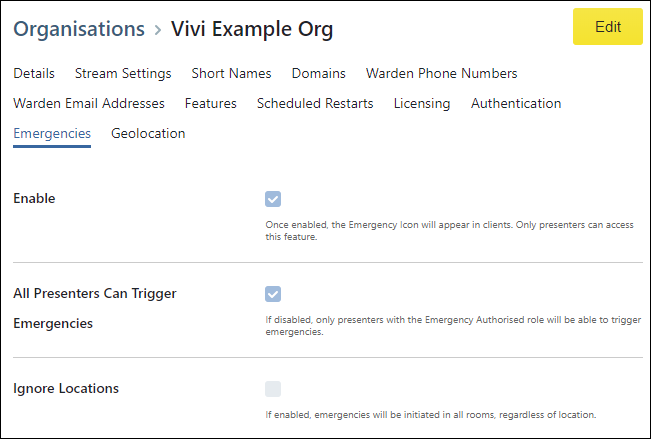
Organisation emergency management settings
...
Two default emergency types – lockdown and evacuation – are populated for each organisation.
You can also create your own custom emergency types can be configured for your organisation.
Any additional emergency types that are created will be visible in the Vivi App to people who have access to trigger an emergency.
Creating Custom Emergency Types
Each custom emergency type will need a default image to be displayed when it is triggered. The relevant image will need to be uploaded to the media library before creating the new emergency type.
To create a custom emergency type:
- Under the "Emergencies" link in Vivi Central, select the "Emergency Types" link.
- Click "Create Emergency Type".
- Enter the following details:
- Name of the emergency type (for example, "Evacuation Drill"). The name will be visible in the Vivi App, and must be 35 characters long or less.
- Description
- Organisation
- Default alert image. This image is the default that will be shown for the emergency type. It can also be changed so that a different image is shown for a particular location or room.
- Click "Save Changes".
...
To modify an emergency type:
- Under the "Emergencies" link in Vivi Central, select the "Emergency Types" link.
- Find the emergency type that you want to edit and click on the emergency type name. This will load the details screen for the emergency type.
- Click "Edit" to modify the name, description or default image.
- To assign different images for different locations and rooms, refer to the "Alert Image Assignment" section.
Organisations can also modify the default "evacuation" and "lockdown" emergency types, including the images that are displayed. These will replace the default images shown below.
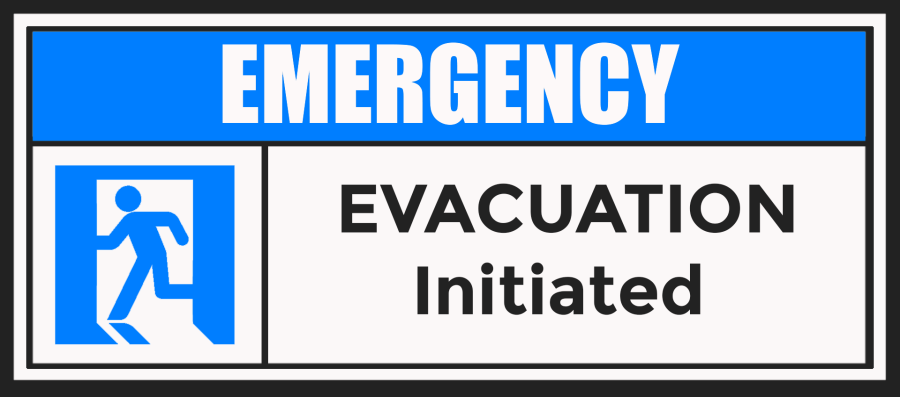
Default evacuation image
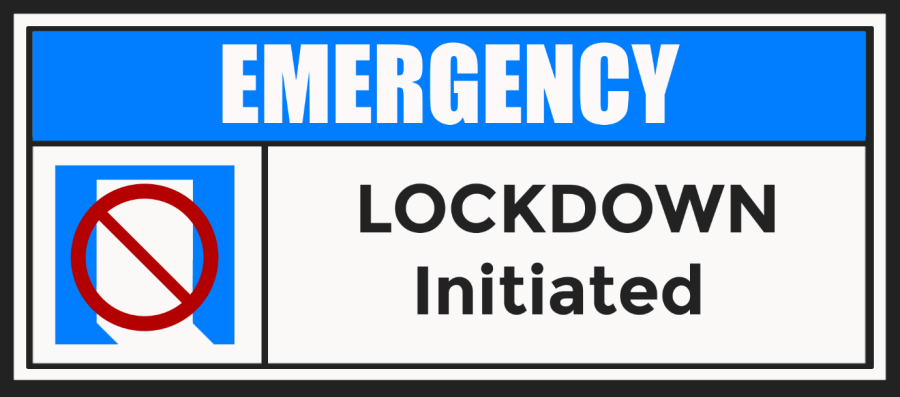
Default lockdown image
...
To delete an emergency type:
- Under the "Emergencies" link in Vivi Central, select the "Emergency Types" link. This will display a list of emergency types.
- Find the emergency type to be deleted, and click the "Delete" button next to the corresponding emergency type.
This will delete the selected custom emergency type.
Please note: The default "evacuation" and "lockdown" emergency types can also be deleted.
Uploading Media
Custom emergency types require an image that is displayed when the emergency type is triggered. These must be loaded into Vivi Central before a new emergency type can be created.
When uploading images for emergency types, the image type must be set to "Splash and emergencies".
...
Each emergency type has a default image that is displayed when the emergency is triggered.
It is also possible to set a different image to be displayed for particular rooms and locations. For example, the images can be updated in different locations to direct people to a different evacuation point.
...
- Under the "Emergencies" link in Vivi Central, select the "Emergency Types" link.
- Find the emergency type that you want to edit and click on the emergency type name. This will load the details screen for the emergency type.
- Click on the "Alert Image Assignments" link at the top of the screen.
- Click "Assign Alert Image".
- Enter the following details:
- Select whether the image applies to a location or a room.
- Select the location or room that the image applies to.
- Choose the image to use.
- Click "Assign Alert Image" to save the changes.
Multiple alert image assignments can be created for different locations and rooms. If any location or room doesn't have its own custom image, the default image for the emergency type will be displayed.
...
Emergency Broadcasting allows a teacher to trigger an emergency message in the event of a critical incident. When an emergency is triggered, every Vivi-enabled Display in the organisation (or location) will communicate the emergency protocol to be followed: evacuation, lockdown or a custom emergency type.
During an emergency broadcast, presenting from devices is disabled until the emergency has been cancelled.
Please note:
- The emergency broadcast icon will appear on a Vivi App version 2.10.0 or later. Earlier versions of the Vivi App are not emergency broadcast enabled.
- The emergency broadcast icon will only appear on the Vivi App if the emergencies feature has been enabled.
- Students do not have access to trigger an emergency broadcast.
To trigger an emergency:
1. Log in to the Vivi App and click on the running man icon in the top right-hand corner. The running man icon is used to access the emergency broadcast page.
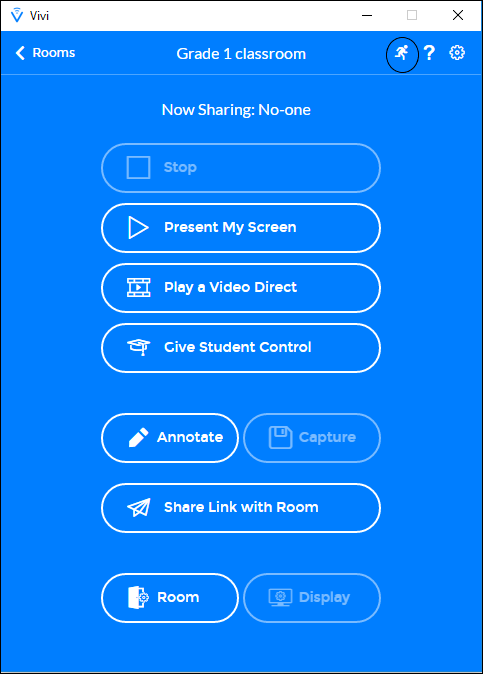
Vivi App running man icon
2. Select the type of emergency. By default, "Lockdown" and "Evacuation" emergency types are displayed. Any other custom emergencies that have been created will also be displayed.
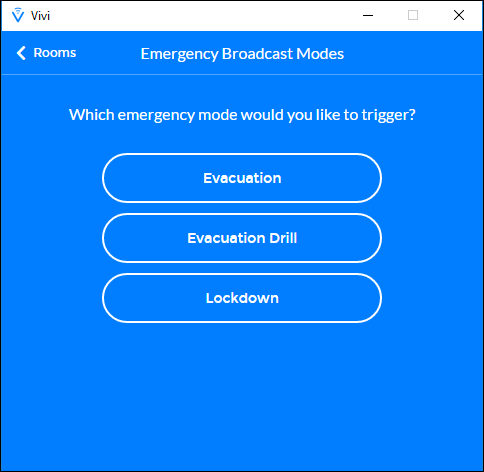
Select the emergency type
3. Click on the appropriate emergency response.
4. Once selected, you will be asked to confirm your choice, in order that accidental emergencies are avoided.
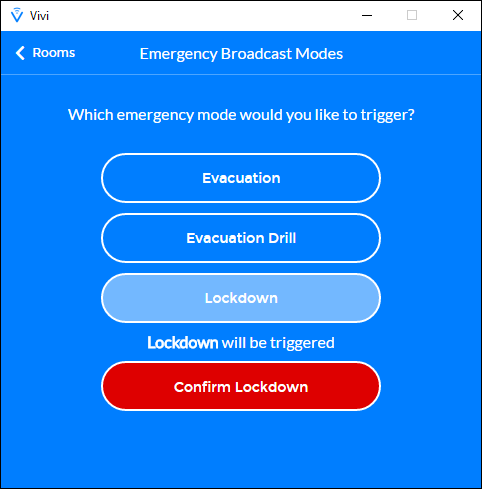
Confirm an emergency
Upon confirming the emergency, all configured Vivi Boxes within the organisation will broadcast a message detailing the type of emergency, who triggered the emergency and the location from which the emergency broadcast was triggered.
Additionally, an emergency broadcast will trigger an email and SMS notification to all pre-configured emergency wardens with information on the situational context.
Details about each triggered emergency is also logged in Vivi Central.
...
An emergency can only be cancelled in one of the following ways:
- By the person who triggered it selecting the Cancel Lockdown/Evacuation button, as shown below.
- By an emergency warden clicking the Cancel Emergency link in the email received after the emergency has been triggered.

Cancelling an emergency
...
Vivi Central tracks all emergencies that have been triggered. To view the emergency history, log in to Vivi Central and select the "Emergencies" list.
A list of all previous emergencies is shown.
Select any of the emergency summaries in the list to find out more information including when it was initiated, completed and how long it was active for.
...
Wardens will be notified via email and SMS of the exact location and originator of an emergency.
They also have the option to cancel the emergency via a special link.
Warden details are set in the organisation settings.
To register warden email addresses:
- Select the "Organisation" link in Vivi Central.
- Select the "Warden Email Addresses" link.
- Click "Edit".
- Add the email addresses as required. Clicking the plus sign will create a new blank line. Clicking a minus sign will delete the entry on the same line.
- Click on "Save Changes".
...
To register warden phone numbers:
- Select the "Organisation" link in Vivi Central.
- Select the "Warden Phone Numbers" link.
- Click "Edit".
- Add the phone numbers as required. Mobile phone numbers need to be used.Clicking the plus sign will create a new blank line. Clicking a minus sign will delete the entry on the same line.
- Click on "Save Changes".
When saved, phone numbers will be re-written into full international format using the country code that matches the organisation.
...