The "Rooms" page allows rooms and the settings for individual rooms to be managed. This includes settings such as default access mode, privacy mode settings and room-specific splash backgrounds.
To view existing rooms at your organisation, select the "Organisation" link in Vivi Central and then select the "Rooms" link.
A list of rooms will be displayed.
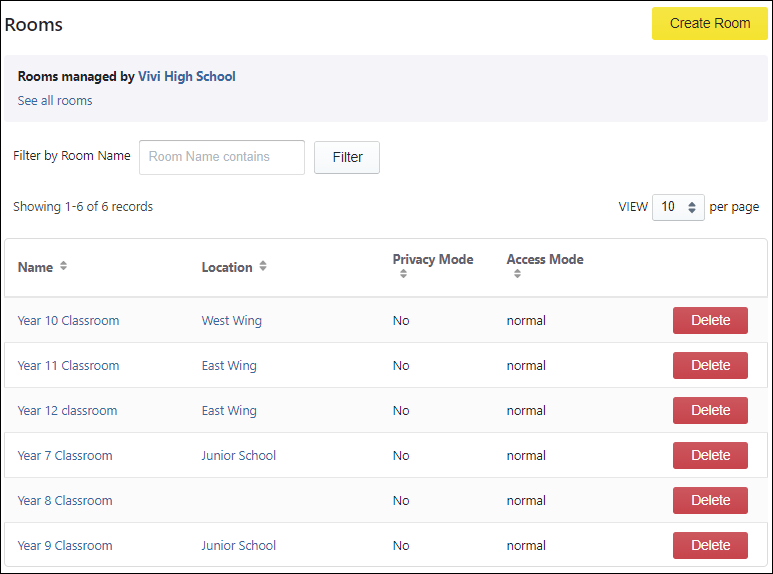
The rooms list
To view the settings for an individual room, click on its name in the list. This will show the "Details" for the room, and show the "Rooms" menu.
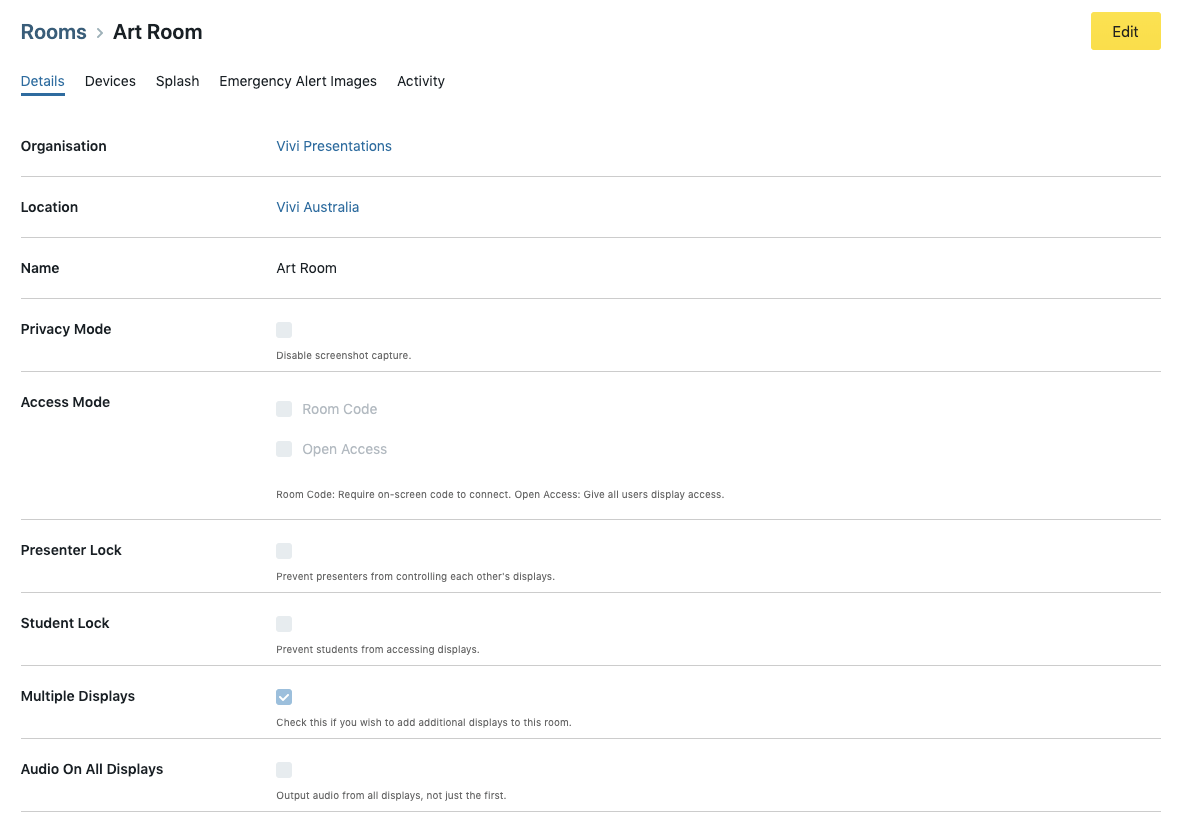
Room details screen

Rooms menu
...
Rooms can be created within a location. This can be done via the "Locations" menu or the "Rooms" menu.
To create a new room via the "Rooms" menu:
- Under the "Organisation" link in Vivi Central, select the "Rooms" link.
- Click "Create Room".
- Select a location for the room.
- Enter the name of the room.
- Click "Create a Room" to save the changes.
The room will be created within the location that was selected.
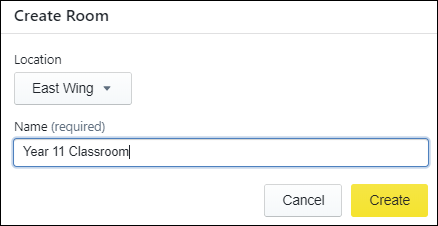
Create a room
Once created, the room "Details" screen will be displayed and the details can be edited.
...
To modify the settings for a room:
- Select the "Organisation" link in Vivi Central and then select the "Rooms" link to see a list of rooms.
- Click the name of a room to load the room details screen.
- Click "Edit".
- The following details can be modified:
- Name
- Privacy Mode – This can be used to disable the ability to capture screen shots.
- Access Mode – A room code can be set if access to use the Display is to be restricted. Further information about the access controls are provided below.
- Presenter Lock – This can be used to lock a display's control to the presenter that's currently using it.
- Student Lock – This can be used to disable the ability for a student to be granted control of a display.
- Multiple Displays – This enables more than one Display to be in the room.
- Audio On All Displays – If "Multiple Displays" is selected, this option determines whether audio comes out of all Displays, or just the first one.
- Click "Save Changes" to finish.
It is also possible to change the location of a room through the "Locations" menu.
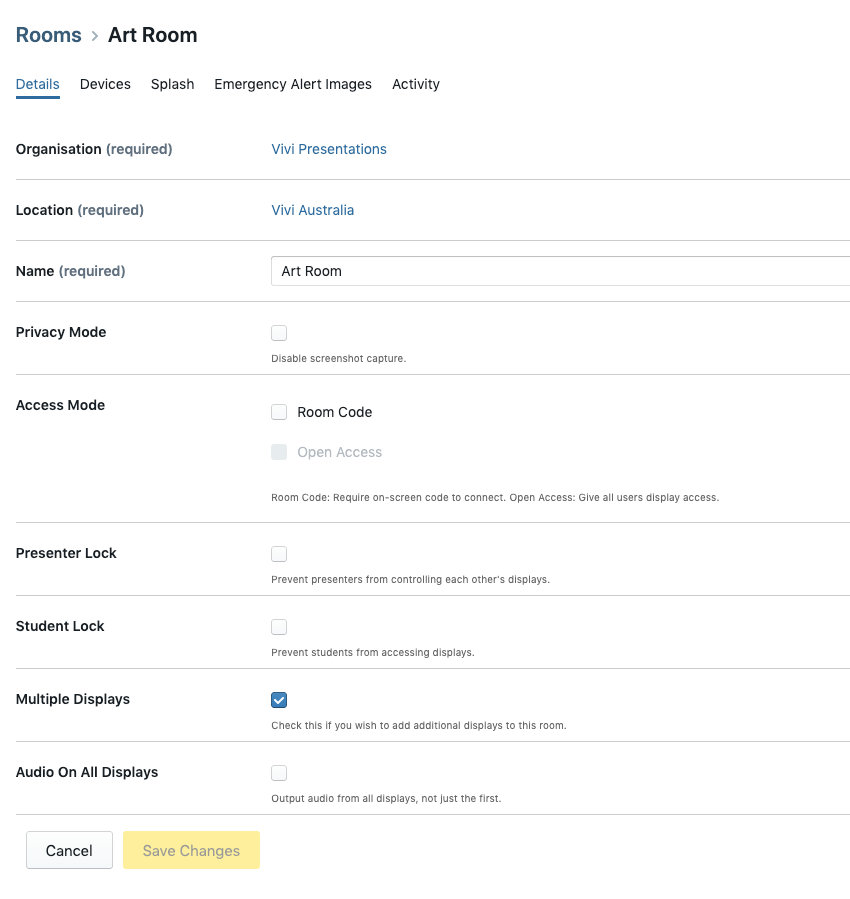
Modifying settings for a room
Access Controls
Room codes can be used to ensure that only the participants who are meant to be viewing the displayed content will be able to do so. Participants won't accidentally start sharing content to the wrong Display and classes won't be interrupted by somebody connecting accidentally.
There are three options for accessing a Display in a Room.
- Normal – No on-screen code appears. Users can simply join the room.
- Room Code – Users enter a four-digit code in their Vivi App to join a room, which will overlay on-screen should another presenter try and join the room while someone is presenting.
- Open Access – Any user can connect to the Display without needing permission from a presenter. This is great for shared spaces like libraries and common rooms.
Please note: These settings can be temporarily overridden by the active presenter on the "Room Settings" page.
...
Rooms can be moved through the "Locations" menu.
To move a Room:
- Under the "Organisation" link in Vivi Central, select the "Locations" link.
- Select an existing location. A list of Rooms in the selected location will be displayed.
- Find the room to move and click "Move".
- Choose the new location from the dropdown list.
- Click "Move Room" to save the changes.
...
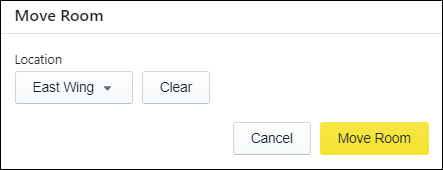
Move Room screen
...
To delete a room:
- Select the "Organisation" link in Vivi Central and then select the "Rooms" link to see a list of rooms.
- Click "Delete" next to the room you would like to delete.
- Confirm that the room is to be deleted.
...
Each room needs a Vivi Box to be assigned to it.
To assign a Box to a room:
- Select the "Organisation" link in Vivi Central and then select the "Rooms" link to see a list of rooms.
- Click the name of a room to load the room details screen.
- Select the "Devices" link.
- If a Box is already assigned to the room, it will be shown.
- To assign a Box to the room, click "Assign Device".
- A list of available Boxes will be shown. Select the MAC address that matches the Box in the Room. The MAC address is printed on the side of the Box.
- Click on "Assign Device" to save the changes.
...
If multiple devices have been enabled in the room, additional devices can be assigned.
The change the Box that is assigned to a room:
- Select the "Organisation" link in Vivi Central and then select the "Rooms" link to see a list of rooms.
- Click the name of a room to load the room details screen.
- Select the "Devices" link.
- If a Box is already assigned to the room, it will be shown.
- Click "Unassign" to unassign it from the room.
- A new Box can then be assigned.

Device assigned to a Room
...
Each room can have its own splash background.
By default, rooms inherit the organisation-wide splash background.
To set a specific background for a room:
- Upload the required image. The image type must be set to "Splash and emergencies".
- Under the "Organisation" link in Vivi Central, select the "Rooms" link.
- Click the name of a room to load the room details screen.
- Click "Splash".
- The screen will show if a custom splash has been set. It will also show any inherited splash screens that the room can use.
- Click on "Set Splash" to change the splash background for the location.
- Select an image from the list of uploaded media.
- Click "Use this image" to save the changes.
...
Once set, if you hover the mouse over the custom splash background, options will be shown to "Change" the custom splash, and to "Use (the) Inherited" splash instead.
...
Rooms can be set up to use multiple Displays.
To set up a multi-display room, first enable the setting in the Room settings page and then assign more than one Box to the room. Their position in the room (and the order that they are displayed in the Vivi App) will be based on the order in which they were added.
To modify the settings for a room:
- Select the "Organisation" link in Vivi Central and then select the "Rooms" link to see a list of rooms.
- Click the name of a room to load the room details screen.
The display name for each Box can also be modified to provide a user-friendly name.
...
Vivi keeps a log of all interactions in a room. This allows you to review who has connected to a room and what activities they undertook.
To view the activity for a room:
- Select the "Organisation" link in Vivi Central and then select the "Rooms" link to see a list of rooms.
- Click the name of a room to load the room details screen.
- Click on the "Activity" link.
- The activity for the room will be displayed.
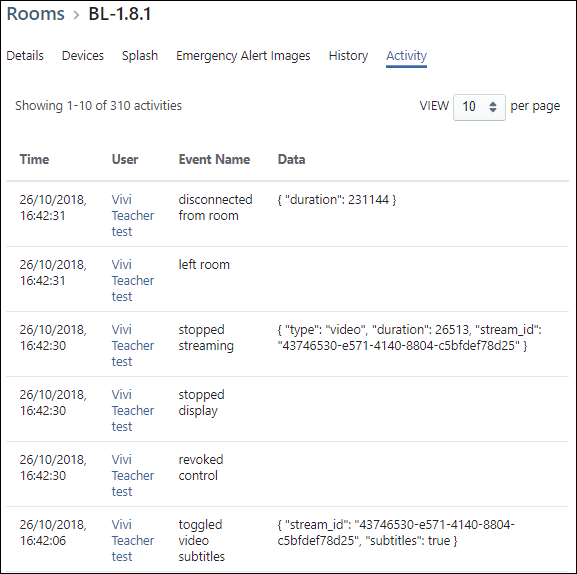
Sample room activity log